P0335 Repair Cost: What You’ll Pay and What Fixes It

Quick Answer
P0335 repair cost often falls near $228 to $334 when the crankshaft position sensor itself needs replacement, based on current 2026 national estimates. Your bill can change sharply if the real problem is damaged wiring, a corroded connector, a timing-related fault, or another mechanical issue, so diagnosis should come before parts replacement; you can also check NHTSA vehicle safety information for manufacturer-related safety information.
What affects the final bill?
- Sensor failure: A straightforward crankshaft position sensor replacement is usually the most predictable repair.
- Wiring damage: Broken, rubbed-through, or corroded wiring can require extra diagnostic and repair labor.
- Connector problems: A loose or contaminated connector can imitate a failed sensor.
- Sensor location: A hard-to-reach sensor can increase labor time significantly.
- Mechanical faults: Timing components or a damaged reluctor wheel can make the repair much more involved.
Best first move
- Scan the vehicle, save freeze-frame data, inspect the sensor circuit, and confirm the failure before approving a replacement part.
If your OBD2 scanner shows P0335, the number on the estimate matters less than finding the real cause first. A crankshaft sensor code can come from the sensor, but it can also come from its wiring, connector, or related engine components.
I treat P0335 as a diagnostic starting point, not a command to buy a sensor. This guide explains the likely 2026 repair cost, what changes the bill, and how to avoid paying for the wrong fix.
In This Guide
What Does Code P0335 Mean?
P0335 is a generic OBD-II diagnostic trouble code related to the crankshaft position sensor “A” circuit. The engine computer sets it when it cannot reliably receive the crankshaft position information it expects.
A crankshaft position sensor monitors crankshaft position and speed as the engine rotates. The engine control module uses that signal to help manage ignition timing, fuel delivery, and engine synchronization.
Why the crankshaft signal matters
The computer needs to know where the crankshaft is during engine operation. If that signal disappears or becomes unreliable, the computer may struggle to determine when cylinders are reaching the correct position.
That can affect starting and normal engine operation. In some vehicles, the engine may still run intermittently because the computer can use other information while trying to establish synchronization.
Common P0335 symptoms can include:
- Check Engine Light
- Long cranking before the engine starts
- Intermittent no-start condition
- Engine stalling
- Rough or unstable running
- Reduced performance
- RPM reading that behaves abnormally during cranking
- Related crankshaft or camshaft synchronization codes
A stored P0335 does not prove the sensor itself has failed. Manufacturer service information has documented cases where harness damage, loose connections, and connector corrosion created the same code.
That distinction matters to your wallet. Replacing a good sensor will not repair a broken wire.
Technician’s note: Treat the code as evidence of a crankshaft signal problem, then test the entire circuit before ordering parts.
How Much Does P0335 Cost to Repair?
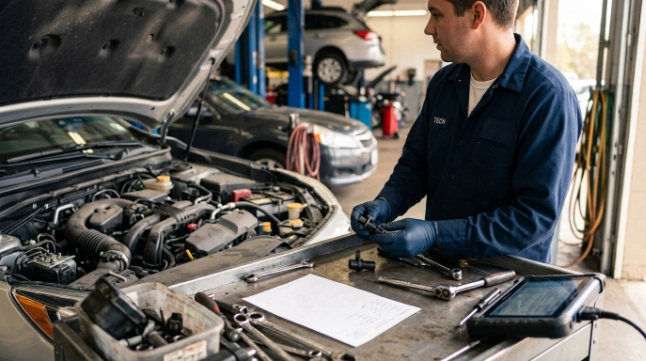
As of August 2026, a national estimate for crankshaft position sensor replacement is about $228 to $334. That includes an estimated $85 to $125 for parts and $143 to $209 for labor, before taxes, fees, location differences, or related repairs.
That figure is useful for budgeting, but it is not a guaranteed P0335 repair price. P0335 describes a circuit problem, not one specific failed part.
P0335 repair cost by likely repair
| Repair scenario | What the technician finds | Expected cost impact |
|---|---|---|
| Crankshaft sensor replacement | Sensor fails electrical or signal testing | Current national estimate is roughly $228–$334 |
| Connector repair | Loose terminal, corrosion, poor contact, or damaged connector | Varies with connector condition and diagnostic labor |
| Harness repair | Open circuit, short, rubbed wiring, or damaged insulation | Can exceed a simple sensor job when tracing or harness access takes longer |
| Timing or reluctor problem | Mechanical timing fault or damaged trigger wheel affects the signal | Potentially much higher because mechanical engine work may be required |
| Software or control issue | Manufacturer diagnosis points to calibration or another control-system issue | Depends on vehicle-specific service information and required programming |
Why labor varies so much
Sensor location is one of the biggest variables. Some crankshaft sensors are easy to reach, while others sit behind shields, brackets, intake components, or other engine hardware.
Vehicle design matters too. A job that is straightforward on one four-cylinder engine can require considerably more disassembly on another engine.
Diagnosis also adds time. A technician may need to inspect wiring, test voltage or continuity, review scan data, and confirm crank-to-cam synchronization before recommending a part.
- Easy-access sensor: Less disassembly usually means lower labor.
- Difficult-access sensor: Removing surrounding components increases labor time.
- Intermittent problem: A fault that appears only occasionally can take longer to isolate.
- Harness damage: Wiring faults may require tracing the circuit through several locations.
- Multiple codes: Related camshaft or timing codes can broaden the diagnosis.
Ask whether the diagnostic charge is separate from the repair estimate. Shop policies vary, and some facilities apply part or all of that fee toward the completed repair.
If you need professional roadside or repair assistance, AAA automotive services can also help drivers locate repair resources.
Repair-cost note: Always request a vehicle-specific written estimate because labor rate, engine configuration, part quality, taxes, and regional pricing can change the total.
Section Takeaway: A sensor-only P0335 repair is often a few hundred dollars, but the code should be diagnosed before that estimate is treated as your final bill.
What Causes P0335 and Changes the Repair Cost?
The crankshaft position sensor is an obvious suspect, but it is not the only one. Several electrical and mechanical faults can interrupt the signal and trigger P0335.
1. Failed crankshaft position sensor
The sensor can fail internally or produce an unstable signal. Heat, age, contamination, and normal component deterioration can contribute over time.
If testing confirms the sensor itself has failed, replacement is usually the most direct repair. This is the scenario that most closely matches the typical national replacement estimate.
2. Damaged sensor wiring
Wiring can rub against moving or vibrating components. Heat, oil contamination, previous repairs, or poor routing can also damage insulation and conductors.
This is not theoretical. A General Motors service bulletin for certain Chevrolet Cruze vehicles documented P0335/P0336 caused by crankshaft-sensor harness slack allowing the wiring to contact a driveshaft.
That bulletin directed technicians to inspect and repair the harness rather than automatically replacing the sensor. It is a useful reminder that the code alone does not identify the failed component.
3. Corroded or loose connector
A poor electrical connection can interrupt the crankshaft signal. Moisture, corrosion, spread terminals, a loose lock, or connector damage can all create an intermittent fault.
Honda has also documented P0335/P0339 on certain Accord and CR-V applications where corrosion existed between the engine harness and crankshaft position sensor connector. Vehicle-specific diagnosis therefore matters.
4. Damaged reluctor or trigger wheel
The sensor reads a rotating target often called a reluctor or trigger wheel. Damage, movement, debris, or abnormal clearance can distort the signal even when the sensor remains electrically functional.
This type of fault can become more expensive because the technician may need deeper mechanical access. The exact repair depends heavily on engine design.
5. Timing belt or timing chain problem
The crankshaft and camshaft must remain synchronized. Mechanical timing problems can produce signal relationships that the computer recognizes as abnormal.
Do not assume P0335 means the timing chain has failed. Instead, investigate timing when scan data, other codes, engine noise, or mechanical symptoms point in that direction.
6. Control-module or calibration problem
Control-module failure is possible but should not be the first conclusion. Manufacturer technical information may identify software updates, connector issues, or known vehicle-specific conditions that should be checked first.
Before approving an expensive module, I want the power supply, ground, sensor signal, and circuit integrity verified. Module replacement without that evidence can turn one problem into two.
Owners of affected GM vehicles can compare their vehicle information with official Chevrolet support resources before relying on a generic internet repair procedure.
Diagnostic note: Service bulletins apply only to specific vehicles and conditions, so never assume a bulletin matches your car without checking the VIN, model year, engine, and manufacturer information.
Section Takeaway: Sensor replacement is only one possible P0335 repair. Wiring, connectors, mechanical timing, and vehicle-specific service issues can change both the diagnosis and the bill.
How Is P0335 Diagnosed Before Parts Are Replaced?
A good diagnosis starts by confirming the code and understanding when it appeared. Clearing P0335 immediately can erase clues that help explain the failure.
Step 1: Scan all available modules and save data
The technician should read stored, pending, and related codes before clearing anything. Freeze-frame data can show engine speed, temperature, load, and other conditions present when the fault was recorded.
- Record P0335 and any accompanying codes.
- Save freeze-frame information.
- Look for P0336, P0339, camshaft sensor codes, or synchronization-related faults.
- Note whether the engine currently starts, stalls, or cranks longer than normal.
Step 2: Inspect the sensor, connector, and harness
A visual inspection can find problems a scan tool cannot. Look for broken connector locks, pulled wires, oil contamination, corrosion, damaged insulation, and harness contact with nearby components.
I put this inspection early in the process because replacing a sensor cannot repair a loose terminal. It is one of the easiest ways to avoid unnecessary parts.
Step 3: Check crankshaft RPM or signal data during cranking
Professional scan tools may display engine speed or crankshaft-related data while the starter turns the engine. An abnormal or missing reading can support further sensor-circuit testing.
Scan data alone still does not prove the sensor is bad. The circuit and mechanical trigger must also be considered.
Step 4: Test the electrical circuit
Testing depends on sensor design and manufacturer specifications. A technician may check power supply, ground, resistance where appropriate, continuity, shorts, connector tension, or signal output.
Do not use generic resistance values or pin locations from another vehicle. Sensor type, wiring layout, connector pinout, and test specification can differ by engine and model year.
Step 5: Check signal quality when necessary
An oscilloscope can be valuable when an intermittent crankshaft signal is difficult to catch. It allows a technician to view the signal pattern rather than relying only on a stored fault code.
Signal testing can help identify dropouts, irregular patterns, or synchronization issues. This is especially useful when the vehicle stalls only under specific heat or vibration conditions.
Step 6: Investigate mechanical timing if the evidence points there
Mechanical inspection comes after the electrical basics unless other symptoms suggest a timing problem immediately. The technician may compare crankshaft and camshaft data or inspect timing components according to manufacturer procedures.
For Honda owners, official Honda owner resources are a safer starting point for vehicle-specific documentation than copying a procedure written for another engine.
Hands-on note: Do not probe or jumper sensor circuits blindly. Incorrect testing can damage terminals or electronic modules, so use the wiring diagram and service procedure for your exact vehicle.
Section Takeaway: The cheapest P0335 repair is the correct repair. Saving scan data, inspecting the harness, and testing the circuit can prevent unnecessary sensor replacement.
Can You Drive With a P0335 Code?
Driving with an active P0335 is not something I recommend ignoring. A failing crankshaft signal can lead to hard starting, stalling, or a no-start condition.
The severity depends on how the fault behaves. A car that runs normally with only a stored code presents a different immediate risk than one that stalls in traffic.
Stop driving and arrange service if:
- The engine repeatedly stalls.
- The engine shuts off while driving.
- The vehicle struggles to restart.
- The engine runs severely rough.
- Multiple timing or synchronization codes appear.
- Unusual mechanical engine noises occur.
If the engine has already stalled unexpectedly, towing may be safer than trying to continue the trip. The possibility of another stall matters more than saving a towing charge.
A Check Engine Light by itself does not tell you the exact severity. Symptoms, related codes, and diagnostic results provide the context.
Safety note: If the vehicle loses power unpredictably or cannot maintain reliable engine operation, have it inspected before normal driving.
Can You Fix P0335 Yourself?
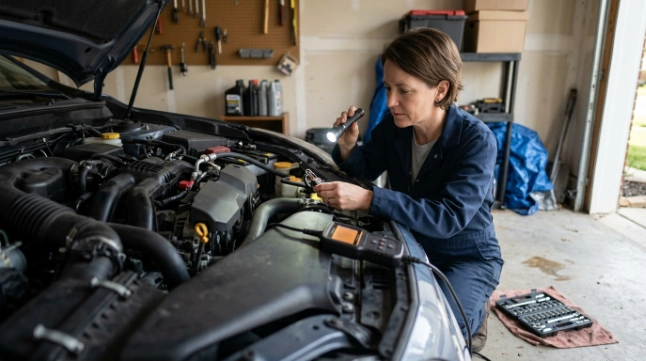
You can perform basic P0335 checks at home if you have an OBD2 scanner and understand electrical safety. Replacing the sensor should come after those checks, not before them.
DIY checks that make sense
- Read and record all diagnostic trouble codes.
- Save freeze-frame data if your scanner supports it.
- Inspect visible sensor wiring for cuts, rubbing, or heat damage.
- Check the connector for looseness, moisture, and obvious corrosion.
- Review the vehicle’s service information for sensor location.
- Check whether a manufacturer bulletin applies to the exact vehicle.
Do not guess at wiring terminals with a test light or jumper wire. Modern sensor circuits connect directly to sensitive electronics.
DIY vs professional P0335 diagnosis
| Task | DIY suitability | Why |
|---|---|---|
| Read P0335 with an OBD2 scanner | Good DIY task | Low risk and useful for initial diagnosis |
| Inspect accessible wiring and connector | Good DIY task | Visible damage may be found without circuit modification |
| Replace an easily accessible confirmed sensor | Possible for experienced DIYers | Procedure and access vary by vehicle |
| Oscilloscope signal diagnosis | Usually professional | Requires equipment and waveform interpretation |
| Harness or timing diagnosis | Usually professional | Incorrect diagnosis can become expensive quickly |
Sensor replacement difficulty changes by vehicle. Some installations take basic hand tools, while others require removing several surrounding components.
After some repairs, the manufacturer may also specify a crankshaft position relearn or related setup procedure. That procedure is vehicle-specific and should come from the correct service information.
DIY note: Never copy a model-specific relearn sequence, wiring pinout, or sensor specification unless it matches your exact year, engine, and vehicle configuration.
P0335 Repair Cost FAQ
How much does it usually cost to fix P0335?
If the crankshaft position sensor itself is the problem, current 2026 national replacement estimates are roughly $228 to $334. Wiring, connector, timing, or accessibility problems can change the total significantly.
Does P0335 always mean the crankshaft sensor is bad?
No. P0335 can also result from damaged wiring, connector corrosion, loose terminals, an abnormal trigger wheel, mechanical timing problems, or certain vehicle-specific issues.
Can a bad connection cause P0335?
Yes. Manufacturer service information has documented P0335 conditions caused by damaged harnesses and corroded crankshaft sensor connections, which is why inspecting the circuit matters before replacing the sensor.
Can I clear P0335 and keep driving?
Clearing the code does not repair the cause. If the crankshaft signal fails again, the engine may have starting problems or stall, so the fault should be diagnosed instead of repeatedly erased.
How long does P0335 diagnosis take?
There is no universal time because access and fault behavior vary. A visible connector issue can be found quickly, while intermittent wiring or signal problems may require extended electrical testing.
Will replacing the crankshaft sensor automatically clear P0335?
Only if the sensor was the actual cause and no additional fault remains. Some vehicles may also require a manufacturer-specified relearn or verification procedure after repair.
Should I replace the camshaft sensor at the same time?
Not automatically. Replace additional sensors only when testing, related trouble codes, or manufacturer procedures show they are faulty or required as part of the repair.
What Should You Do Next?
Start with a complete scan and save the data before clearing P0335. Then inspect the crankshaft sensor connector and wiring before assuming the sensor has failed.
If testing confirms the sensor, a few-hundred-dollar repair is a reasonable budgeting expectation based on current national estimates. If the circuit or mechanical timing is involved, get a written diagnosis and vehicle-specific estimate before authorizing deeper work.
The biggest money-saving step is simple: diagnose P0335 first and buy parts second.
